This article is part three of my Behringer Air XR18 review and will continue the focus on the last 4 control tabs that make up the channel strip. If you missed parts one and two of the review, then click here for part one and here to read part two.
The Sends Tab:

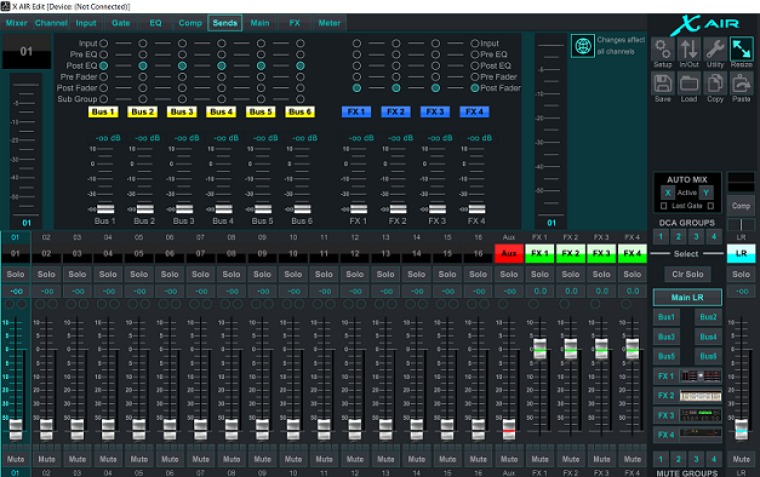
The Send tab allows you to change how each channel is routed to the Send and Effect busses. There on this tab we can change the amount signal being passed to one of the all 6 of the physical AUX busses and 4 of the internal effect units. You can also configure the each channel sends to be in Pre EQ, Pre Fader, Post Fader or Sub Groups modes. These modes can be changed globally (set the mode for all channels being sent to a bus) or can be adjusted on a channel by channel bases. It's also possible to make the same changes by selecting a buses Master Fader and selecting to the Sends Tab.

The mixer has a Sends on Fader mode as well and this can be done by selecting the bus you want modify. Just remember to go back to the Master bus if you want to make changes to the FOH mix.
One of the drawbacks on how the routing is designed is that if you want to use a Sub Group you must give up a physical AUX channel in order to do so. The software does not allow you to use one of the 4 effect busses as a SubGroup. You can get around this by using one of the 4 DCA's but that does not allow you to insert any effect processing or EQ because it's not an audio path. A DCA's basically allows you to position faders on several channels and then trim or boost them all by adjusting DCA's fader.
The Main Tab:

There is not much on the Main tab but what is there is still quite important. This tab allows you to set the Pan, Left and Right assign (you need to disable this if you add the channel to a Sub Group), DCA' assign, Mute Group assign and Auto Mix assign.
The Effects Tab:

The Effects tab houses 4 virtual Effect Units which can be set to a decent amount of effects. You can also insert each effect unit into a channel from this tab. Selecting one of the 4 images of the effect units will bring up a new window that will allow you to edit the parameters of the effect unit you selected. Effects can be run in stereo or two channel mono. In the case of thetwo channel mono mode you can set parameters on each channel independently.
I don't find myself using a lot of the effect other than the Vintage Reverb, Virtual Guitar Amp and the Wave Designer (a compressor that reacts to large jumps in audio volume). I often find myself assigning the Virtual Guitar Amp to a channel that has an Acoustic Guitar assigned to it, just because it gives the Guitar a different tone which I just sound grate. The Virtual Guitar Amp also dose a reasonable job with Base Guitars although is not a 100% replacement for a real base amp and cab.
The only effect that I'd like to have that is not part of the list of on-board effects is a simple Time Delay. There are Delay effects by they all have modulation and makes them unusable for situations where you need to have delayed speakers in order to have even sound distribution in a large room.
I've got no complaints about the sound quality of the effects they all sound good and do the job. Some of the Effect Units have more premasters than I feel are necessary. There is one minor issue that effect processing dose have,if you change the Pre-delay parameter on any of the effects the sound through FOH will cut out for a split second.
The Meeter Tab:

The last tab is the Meter tab and it's a very detailed meter bridge. Its grate this page is here because unlike an analogue mixer you can't always see the signal and peak indicators. Viewing this screen, you get a complete view of the levels from all the cannels and path ways the mixer has.
If I'm not making any changes to the Inputs, EQs, Effects or routing I typically will leave the Meter tab open so I can see; at a glance, what is going on. The meters displayed include channels 1-18, Effect Sends 1-4, Effect Returns 1-4, Buss Outputs, USB returns, Ultranet Sends 1-16 solo left/right and the Master Left/Right.
Part 4 will focus on the tools that are on the right had side of the interface. These tools include the buttons which open the Set Up window, In/Out Matrix window, Utility Window, and the Snapshot Options Window.
Zach Radloff lives on the Gold Coast and is studying IT and Multimedia at university and is also a qualified Live Production, Theatre and Events Technician.
Zach Radloff's previous articles may be viewed at www.pressserviceinternational.org/zach-radloff.html