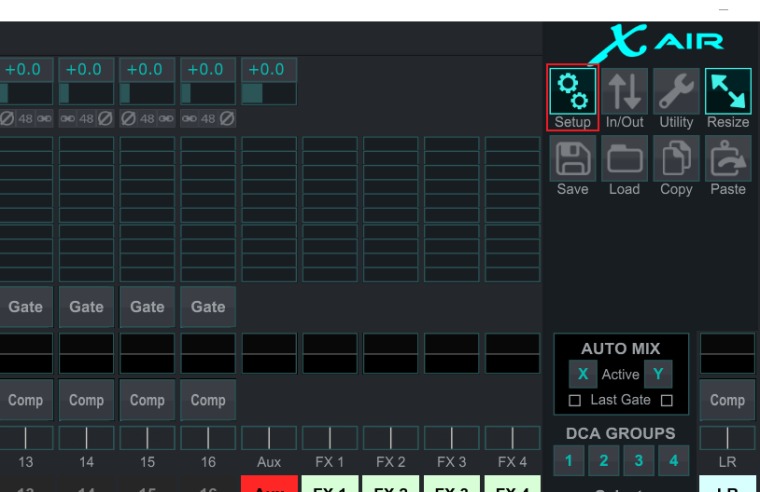
This article is part four of my Behringer Air XR18 review and will the focus on the Set Up Window. If you missed parts one, two or three of the review, then:

There are a total of 8 buttons on the left hand side that allow you to configure and manipulate the mixer. The first button (ladled Setup) opens the general settings for the mixer. The Setup Window has 7 tabs:
- X AIR Connection

This tab's main purpose is to allow you to connect the X Air Edit Software to the mixer over a network. From the list you can select the mixer you want to control. You can sync the software to the mixer or the mixer to the software application. This means that even if the application crashes you can re-sink to the mixer with the control software without overriding any of the settings or positions of faders, EQ s, sends, compressors, gates, etc.
You can also reset the mixer to a zeroed state by clicking on the Initialize button. The final thing you can do on this page is flash the firmware. The firmware number is also visible on the bottom right hand corner of the window.
- Access Point

Under this tab is all the settings for the on-board Wireless Access Point (WAP). You can set the wireless network name (SSID - Service Set Identifier) as well as an WEP password to secure the wireless access point. You can also set the channel the WAP broadcasts on (Channels 1-11 are supported).
When using the on-board WAP only 5 devices can be connected at once. This means that if you leave the WAP unsecured random devices can auto connect to it. If your control computer or tablet loses connection to the WAP; during a show, it's possible for other people's devices to connect to the WAP. If 5 other devices that aren't yours connect you won't be able to connect to the network to regain control of the mixer.
This worst case scenario is prone to happen if audience members' phones are set to auto connect to unsecured networks. This is likely to happen as auto connect turned on by default on the majority of smart phones and windows 10. Therefore, I always recommend that when using the WAP you secure the it with a WEP password so that only your devices are can connect to the mixer. I don't typically use this mode to connect to my mixer as I use an external WAP.
- WLAN

The WLAN (Wireless Local Area Network) tab allows you to connect the mixer as a client on an existing wireless network. I've never need to use this feature set as my mixer is always connected to an external WAP. From the looks of it this mode supports WEP WPA and WPA2 however there are no enterprise grade wireless security algorithms.
- LAN

The LAN (Local Area Network) tab has all the settings to run the mixer on a LAN network. You can set it to have a static IP address or allow a DHCP to auto assign an IP address. You can also manually set the mixer to obtain an IP address from a particular DHCP server. I typically connect to the mixer through the LAN connection mode as I run a private LAN network that has a WAP connect to it. This way I get good security not offered by the on-board WAP and I don't have worry about a device connection limit. It also allows me to place the WAP in the best possible location to improve signal integrity.
- Audio/Midi

There are a lot of settings grouped under the Audio/Midi tab.
Clock Rate allows you to set the mixers sample rate to 48kHz or to 44.1 kHz. Note that this setting also changes recording sample rate as well. I've found that the 48kHz mode sometimes slows down the mixers RTA (Real Time Spectrum Analyser) response time when you have a lot of other effect processing in use (using a lot of the EQ's, gates, compressors and effects). This slow down doesn't affect the processing of the audio though. I haven't noted any quality issues between the 48kHz or to 44.1 kHz modes but I always use the 48kHz mode so that the audio is always the best quality for the audience and any recordings I do.
The Safe Levels setting allows you to mute the out puts during a power cycle. This is particularly handy if you need to turn the mixer on and off gain without having to turn off the equipment in your output chains (FOH, monitors, amps and IEM's).
The Linked Pref. Setting allows you to change what gets synced in stereo channels. By default stereo linked channels will share the pre-amp, EQ, Dyn(send to insert effect) and Fader/Mute/Send settings. By unchecking these options, you can have more control over the left and right side of the stereo channels. I haven't come across a situation that needs this feature yet but is still nice that it's an available option.
The Mute System has two settings you can turn on and off:
1. Hard Mutes: when turned on the individual channel mutes take precedence over the mute groups. This means that if you have a channel muted and assigned to a mute group and then un-mute with the mute group the channel will stay muted.
2. DCA Groups: Enabling this setting will allow DCA groups to mute channels. By default, muting a DCA will do nothing.
The USB Interface setting allows switching between two recording modes:
1. 18/18 ch: record up to 18 channels and have up to 18 channels USB returns. The 8/18 mode is primarily designed for multi-track recording. This mode is particular handy if your DAW is fast enough to use its effects as real time virtual effects. I haven't tried this with Tracktion4 (which is bundled for free with the mixer) but with a little fiddling I got it to work with Mixcraft7.
2. 2/2 ch: imitates the tape deck in/out that analogy mixers have. In this mode you can only record two channels and have 2 USB returns.
This setting group allows you to set up how the midi in/out/pass though works on the mixer. I haven't used any midi equipment with the mixer and the documentation for it is almost non-existent. From what I've read you can use the mixer as a midi USB interface or you can use it to connect a midi based control surface like the Behringer X-Touch.
- Monitor

This tab has all the settings related to the headphones out.
With the Monitor Source setting allows you to select where the source of the solo comes from when you're not soloing anything.
The channel Solo Setting Allows you to switch channel soloing to pre or post fader. The Buss Solo Setting allows you to switch buss soloing to pre or post fader.
The rest of the settings here allow you to manipulate the gain structure of the solo and trip how loud the solo out is.
- Preferences

The final tab has a lot of settings for how the interface behaves. Most of the settings are self-explanatory and allow you to customize your work flow in the software. The settings here only really need changing if you used to the work flow of a different digital mixer.
The only setting on this tab that is a little confusing is the Fader Mode Setting. This mode when turned on allows the faders to move in smaller increments and in theory give you more control when moving faders. When I turned this mode on the faders felt less responsive and a little floaty. Safe to say I turned this mode off fairly quickly. While I don't personally recommend setting the Fader Mode to on but I would suggest trying it out for yourself to see if you like using it or not.

Part 5 will focus on the rest of the tools that are on the right had side of the interface. These tools include the buttons which open the In/Out Matrix window, Utility Window, and the Snapshot Options Window. Part 6 should contain my overall feelings about using the mixer in a production environment and any final closing thoughts.
Zach Radloff lives on the Gold Coast and is studying IT and Multimedia at university, and is also a qualified Live Production, Theatre and Events Technician.
Zach Radloff's previous articles may be viewed at www.pressserviceinternational.org/zach-radloff.html