
This article is part five of my Behringer Air XR18 review and will the focus on the last few interface features. If you missed parts one, two, three or four of the review, then:
- click here for part one
- click here to read part two
- click here to read part three
- click here to read part four
There are a total of 8 buttons on the left hand side that allow you to configure and manipulate the mixer.
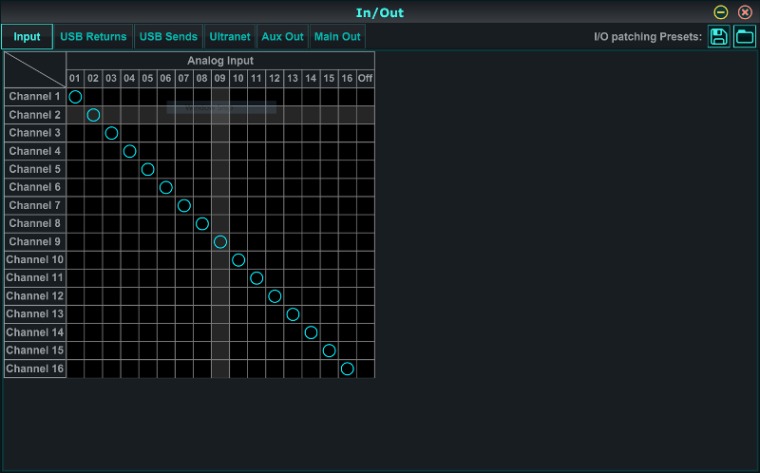
The second button (ladled In/Out) opens the In/Out window. This window contains all the routing settings. From the Input tab you can configure the soft patching. One thing to note is that when you send an input to two channels (using soft patching) both channels share the same preamp.

The USB return tab allows you to set the default USB return channel for the four FX busses and each channel.

The USB Send tab allows you to select the recording sources for all 18 channels on the multitrack USB interface. With the multitrack interface you can choose to record from any Channel, FX Buss, Multi Buss or the Master.

If you DAW is fast enough that latency is not a problem than you can also set up the USB sends and returns as virtual VST effects inserts. While I have gotten this to work in Mixcraft6 (I haven't tried it with 7 yet) it's not always practical in situations where you have limited time at an event.
The Ultranet Tab allows you to select the 16 sources for the Behringers P16-M IEM mixers. I haven't used this yet because as the P16-M seems a little too overpriced to justify spending the money on them. You could also use the Ultranet to digitally send sound to speakers like the Turbosound iQ Series. Although I haven't tried this out either.

The AUX out tab allows you to select what source the 6 AUX channels have. By default, they are set up to be the output for the 6 AUX busses but you can change each AUX out to instead be a channel's direct out, fx out (pre or post on board effect insert) and even a duplicate of the master out.

And finally the Main Out Tab allows you to select what the Main output and Head Phones out will have.

Moving on from the In/Out window we have the utility button which brings up a drop down list. From this list you can bring up a windows with an RTA, all the controls related to the busses, all controls related to all the DCA's. The last two options User 1 and 2 allows you to set up custom windows with custom banks of controls in any order that you want.

The User 1 and 2 windows are particularly helpful to create a custom master section that has all the Busses, DCAs along with the master fader.
I have been experiencing an issue when I'm moving a channel fader and a fader on the User 1 and 2 windows will also shift. I think this may be an issue with the touch screen I'm using however I haven't been to pinpoint the problem yet. To get around this issue I only have the User 1 and 2 windows open when I'm using them and immediately close the User 1 and 2 windows before adjusting any other control.
The resize button allows you to resize the windows so that all components of the interface are a suitable size on your screen. I don't find the Standard, Medium, High and Ultra settings particularly helpful. The Window Height option seems to give the best user interface sizing.
The last four buttons handle the copy and paste functions. You can copy and paste everything from an EQ to an entire channel strip. The ability to copy and paste is defiantly useful because you can bring up two of any part of the mixer side by side in order to easily duplicate settings manually. You can also save parts of the mixer and then load them back again.

Perhaps more useful is the snapshot function. A single Snapshot saves every setting on the mixer (although you there are options to exclude specific settings). You can save snapshots directly to you PC for recall later or save them two one of 64 slots in the mixers memory. The later feature is handy if you ever use the mixer in a play or musical environment This feature also is useful if you have multiple bands playing on the same stage over an event. All you need to do is give each band a sound check before the event's start time and then you can transition to the next band without pausing for a sound check in the middle of the show.
I Also keep my mixers zeroed state in one of the mixer's snapshot memory slots so that I can zero out the mixer at any point in time. With an update to the X AIR Edit program they have fixed the bug where scrolling paste the 64th snapshot crashed the program.
Part 6 will focus on my overall feelings about using the mixer in a production environment and any final closing thoughts.
Zach Radloff lives on the Gold Coast and is studying IT and Multimedia at university, and is also a qualified Live Production, Theatre and Events Technician.
Zach Radloff's previous articles may be viewed at www.pressserviceinternational.org/zach-radloff.html